Module 08: Editor Integration on Omarchy
In this module — 53 sections
- What You Will Learn
- 8.1 — Omarchy’s Default Editor
- 8.2 — Why the Omarchy Default Matters
- 8.3 — Launch the Editor
- 8.4 — Launch Neovim from the Terminal
- 8.5 — Neovim vs LazyVim
- 8.6 — Modal Editing
- 8.7 — Normal Mode
- 8.8 — Insert Mode
- 8.9 — Save
- 8.10 — Quit
- 8.11 — Save and Quit
- 8.12 — Quit Without Saving
- 8.13 — Undo
- 8.14 — Basic Movement
- 8.15 — The Leader Key
- 8.16 — Fuzzy Find Files
- 8.17 — Search Project Contents
- 8.18 — File Sidebar
- 8.19 — Move Between Sidebar and Editor
- 8.20 — Resize the Sidebar
- 8.21 — Git Controls
- 8.22 — Editor + Git + AI Workflow
- 8.23 — Use the Editor Inside Tmux
- 8.24 — Open the Correct Project
- 8.25 — Safe Configuration Editing
- 8.26 — Open an Omarchy Config
- 8.27 — Prefer Small Changes
- 8.28 — Omarchy Config Editing Through the Menu
- 8.29 — Do Not Use sudo for Personal Config
- 8.30 — Neovim Swap Files
- 8.31 — Why Swap Warnings Appear
- 8.32 — Safe Swap Recovery Workflow
- 8.33 — Recover From a Swap File
- 8.34 — If You Do Not Want Neovim
- 8.35 — Recommended Editor Strategy
- 8.36 — Theme Integration
- 8.37 — Do Not Build a Neovim Config From Scratch Yet
- 8.38 — Editor Configuration vs Omarchy Configuration
- 8.39 — Find Before Opening
- 8.40 — Search First, Edit Second
- 8.41 — Practical Exercise: Open a Project
- 8.42 — Practical Exercise: Edit and Save
- 8.43 — Practical Exercise: Search the Project
- 8.44 — Practical Exercise: File Sidebar
- 8.45 — Practical Exercise: Git Controls
- 8.46 — Practical Exercise: Open Omarchy Configuration Safely
- 8.47 — Practical Exercise: Default Editor Discovery
- 8.48 — Practical Exercise: No-Mouse Editing Survival
- 8.49 — Common Editor Mistakes
- 8.50 — Checkpoint
- 8.51 — What You Can Now Do
- Module 8 Summary
About This Module
You now have:
- a working Omarchy workstation;
- terminal fluency;
- Tmux;
- reproducible runtimes with mise;
- Git and GitHub.
Now we add the editor layer.
Current Omarchy ships with Neovim as its default editor and provides a complete Neovim setup through the omarchy-nvim package. The current official Omarchy documentation states that this setup is built on LazyVim, so you get a powerful development environment without building a Neovim configuration from scratch.
At the same time, Omarchy supports alternative editors.
Current official Omarchy development documentation lists:
- VS Code;
- Cursor;
- Zed;
- Sublime Text;
- Helix;
- Vim;
- Emacs;
through the Omarchy editor-install workflow.
The goal of this module is not to turn you into a Neovim expert.
The goal is:
open project
→ find file
→ search code
→ edit safely
→ save
→ recover from common mistakes
→ return to Git / AI workflow
That is enough to make the editor a reliable part of the workstation.
What You Will Learn
By the end of Module 8, you will be able to:
- understand how Omarchy selects the default editor;
- launch the configured editor;
- understand why Neovim is Omarchy’s default;
- understand the difference between Neovim and LazyVim;
- open files and directories;
- understand Normal, Insert, and Command mode;
- save and quit;
- fuzzy-find files;
- search project contents;
- use the file sidebar;
- move between editor windows;
- use Git controls from the editor;
- understand safe configuration editing;
- understand Neovim swap-file recovery;
- choose a different editor if Neovim is not for you;
- keep editor configuration upgrade-safe.
8.1 — Omarchy’s Default Editor
Current official Omarchy documentation states that Neovim is the default editor.
You can change the system-wide default editor through:
Super + Space
→ Setup
→ Defaults
→ Editor
The currently documented alternative editors include:
VS Code
Cursor
Zed
Sublime Text
Helix
Vim
Emacs
The available list can evolve.
Use the current Omarchy menu or current CLI help instead of assuming a static list forever.
8.2 — Why the Omarchy Default Matters
The default editor is used by more than one shortcut.
For example, Omarchy configuration actions may open a config file using the selected default editor.
That means:
Setup > Monitors
Setup > Keybindings
Setup > Input
Setup > Config
can all respect the editor you selected.
This is better than manually hard-coding an editor in every workflow.
8.3 — Launch the Editor
Current official Omarchy hotkeys include:
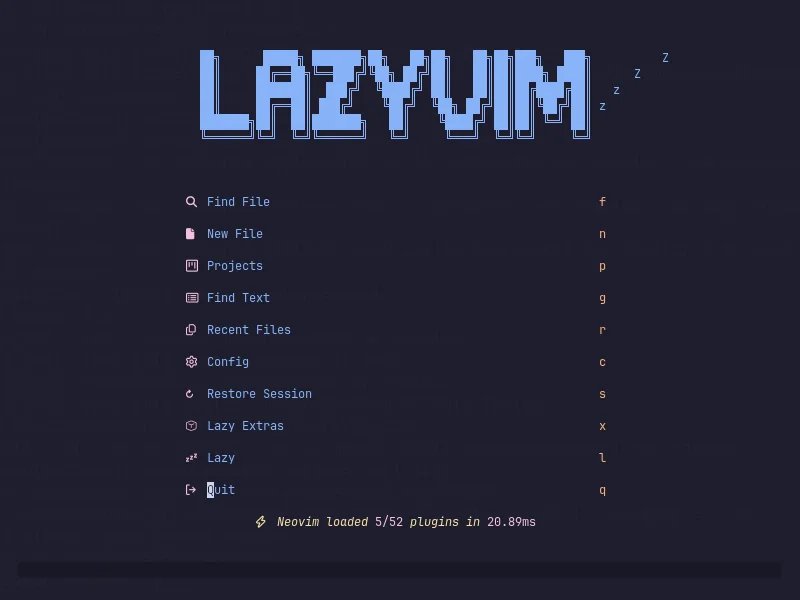
Super + Shift + Nfor launching the editor.
On the default setup, this opens Neovim.
8.4 — Launch Neovim from the Terminal
Open a file:
nvim README.mdOpen a project directory:
cd ~/Projects/YOUR_PROJECT
nvim .
Opening the directory is usually the more useful development workflow.
8.5 — Neovim vs LazyVim
This distinction matters.
Neovim
Neovim is the editor itself.
LazyVim
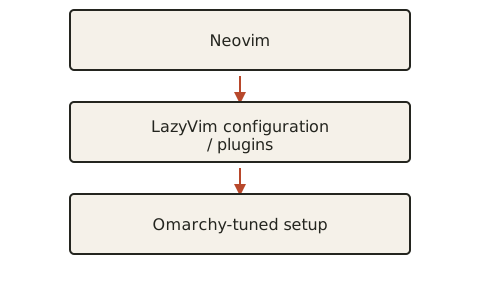
LazyVim is a curated configuration/plugin distribution built on Neovim.
Current Omarchy documentation states that the default omarchy-nvim setup is built on LazyVim.
Conceptually:
So when you press:
Spaceand see a command menu, that behavior is largely part of the configured LazyVim experience rather than bare Neovim alone.
8.6 — Modal Editing
Neovim is a modal editor.
The most important modes for this course are:
Normal mode
Insert mode
Command-line mode
You do not need to learn every Vim mode.
8.7 — Normal Mode
Normal mode is the main navigation/command mode.
When Neovim starts, you are normally in Normal mode.
In this mode:
keys perform editor actionsrather than directly entering text.
This is the biggest conceptual difference from mainstream editors.
8.8 — Insert Mode
Press:
ito enter Insert mode.
Now typing inserts text normally.
Return to Normal mode with:
EscA core survival loop is:
i
→ type

Esc
→ stop typing / return to commands
8.9 — Save
From Normal mode:
:wthen:
EnterThis means:
write the file8.10 — Quit
From Normal mode:
:qthen:
Enter8.11 — Save and Quit
Use:
:wqThis is especially useful because Omarchy’s own dotfile documentation explicitly references :wq when editing configuration through the Omarchy menu.
8.12 — Quit Without Saving
Use:
:q!This discards unsaved changes.
Use it intentionally.
8.13 — Undo
In Normal mode:
uundoes the previous change.
Redo:
Ctrl + R8.14 — Basic Movement
In Normal mode, traditional Vim movement keys are:
h
→ left

j
→ down

k
→ up

l
→ right
You can also use arrow keys.
For this course, using arrow keys initially is completely acceptable.
Learn Vim movement gradually.
8.15 — The Leader Key
Current Omarchy/LazyVim documentation uses:
Spaceas the leader key.
Press:
Spaceand wait briefly.
You should see available command groups.
This is one of the most useful discovery features in the editor.
Course Rule
Do not memorize the whole LazyVim command map. Press
Spaceand discover.
8.16 — Fuzzy Find Files
Current official Omarchy Neovim documentation identifies:
Space Space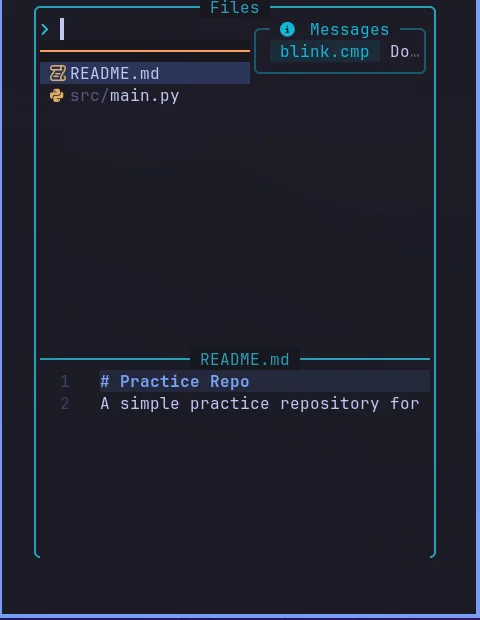
as the shortcut to fuzzy-find a file in the current project.
This is one of the most valuable editor shortcuts.
Workflow:
Space Space
→ type part of filename
→ select
→ Enter
You no longer need to browse directory trees manually.
8.17 — Search Project Contents
Current official Omarchy documentation identifies:
Space S Gfor searching file contents across the project.
Conceptually:
ripgrep-style project search
+
interactive preview
This is ideal for:
- finding functions;
- finding TODOs;
- finding config references;
- tracing API names.
8.18 — File Sidebar
Current official hotkey documentation identifies:
Space E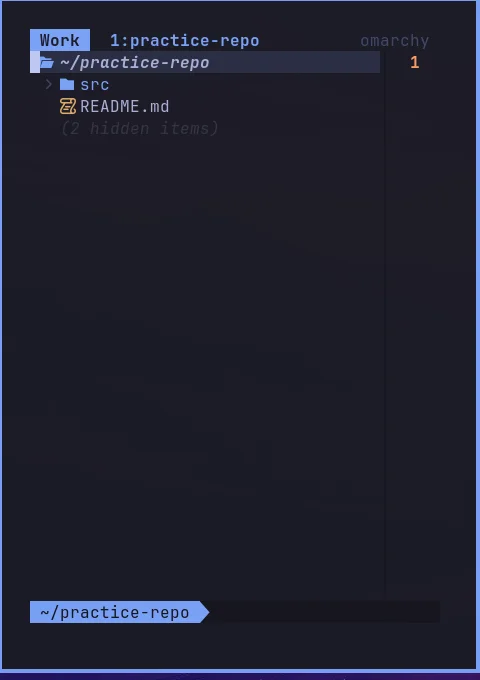
for toggling the file sidebar.
Use this when you want a visual project tree.
Do not feel obligated to keep it open permanently.
A strong workflow is:
Space Space
→ fast file navigation

Space E
→ structural overview
8.19 — Move Between Sidebar and Editor
Current official Omarchy hotkey documentation identifies:
Ctrl + W Wfor jumping between sidebar and editor windows.
This is useful when using the file tree.
8.20 — Resize the Sidebar
Current official Omarchy hotkey documentation identifies:
Ctrl + Left
Ctrl + Right
for changing the sidebar width.
Exact behavior is tied to the current configured Neovim/LazyVim setup, so use the current in-editor command hints if a future release differs.
8.21 — Git Controls
Current official Omarchy hotkey documentation identifies:
Space G Gfor Git controls.
This opens Lazygit integration from inside Neovim.
You already learned Lazygit in Module 7.
This creates a useful workflow:
edit
↓
Space G G
↓
inspect diff
↓
stage
↓
commit
↓
return to editor
Practice with Superkey
Lesson Editor basics — 6 steps covering 8.15 to here: press Space and wait for the leader menu, open the file finder, search the whole project, open the file sidebar, resize it with Ctrl + ←/→, and open Lazygit inside the editor. Superkey opens a throwaway sample project, so nothing of yours is edited. Click SK in the bar → Neovim → Editor basics, or launch it directly:
omarchy-shell shell summon stevinator.superkey '{"lesson":"nvim.basics"}'8.22 — Editor + Git + AI Workflow
A practical development loop looks like:
Editor
→ inspect/change code

AI agent
→ analyze or implement

Git
→ review exact diff

Tests
→ verify behavior

Editor
→ refine
The editor is one part of the system, not the entire system.
This matters because our workstation is deliberately multi-tool.
8.23 — Use the Editor Inside Tmux
A common development layout:
┌──────────────────────┬──────────────────────┐
│                      │                      │
│       Neovim         │       AI Agent       │
│                      │                      │
├──────────────────────┴──────────────────────┤
│                  Terminal                   │
└─────────────────────────────────────────────┘
This is exactly the kind of layout Omarchy’s current tdl helper is designed to support.
The editor, agent, and shell remain visible at the same time.
8.24 — Open the Correct Project
Before launching the editor:
cd ~/Projects/YOUR_PROJECTThen:
nvim .This matters because:
- fuzzy file search;
- content search;
- Git integration;
- AI context;
all depend heavily on the current working directory/project root.
8.25 — Safe Configuration Editing
Omarchy is heavily configured through files under:
~/.configExamples:
~/.config/hypr/monitors.lua
~/.config/hypr/input.lua
~/.config/hypr/bindings.lua
Current official Omarchy dotfile documentation recommends editing user-owned configuration under ~/.config, not package-owned files under /usr/share/omarchy.
This same rule applies whether the editor is Neovim, Helix, VS Code, or another editor.
8.26 — Open an Omarchy Config
Example:
nvim ~/.config/hypr/bindings.lua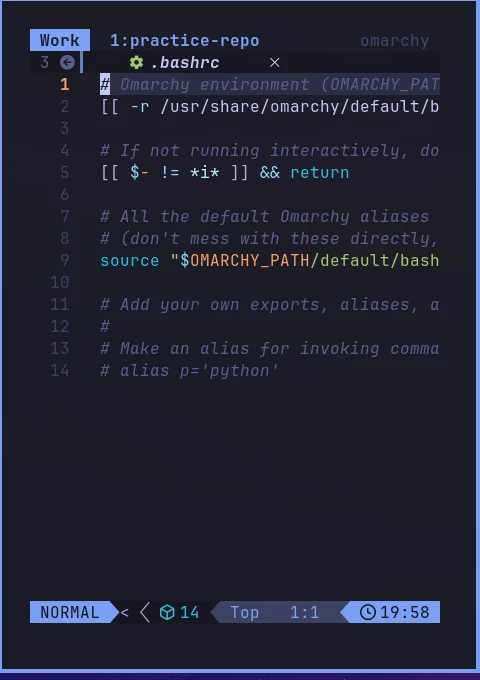
Before changing anything:
- read the file;
- understand the existing structure;
- change one thing;
- save;
- verify behavior.
Do not rewrite entire config files because a tutorial showed a full replacement.
8.27 — Prefer Small Changes
Good:
add one bindingBad:
replace entire bindings.lua
with random configuration from GitHub
Small changes are easier to:
- understand;
- reverse;
- commit;
- troubleshoot;
- carry forward across Omarchy updates.
8.28 — Omarchy Config Editing Through the Menu
Current official dotfile documentation states that key configs can be opened directly through the Omarchy Menu.
Examples include:
Super + Space
→ Setup
→ Monitors
or:
Setup
→ Keybindings
or:
Setup
→ Input
When opened through Omarchy’s own configuration workflow, processes that require a restart/reload after editing can be handled automatically once the editor exits.
This can be safer than manually guessing which component needs restarting.
8.29 — Do Not Use sudo for Personal Config
Do not normally run:
sudo nvim ~/.config/hypr/bindings.luaYour personal config belongs to your normal user.
If you need sudo to edit your own files, investigate ownership before forcing the issue.
8.30 — Neovim Swap Files
Neovim may create a swap file while a file is open.
This helps recover unsaved work after:
- crash;
- killed terminal;
- machine restart;
- editor failure.
Sometimes, when opening a file, Neovim may warn that a swap file already exists.
This does not automatically mean the file is corrupted.
8.31 — Why Swap Warnings Appear
Common reasons:
another Neovim instance still has the file openor:
a previous Neovim session crashedThe warning exists to stop you from accidentally overwriting unsaved changes.
8.32 — Safe Swap Recovery Workflow
If Neovim reports an existing swap file:
- read the warning;
- check whether the file is already open elsewhere;
- if another editor instance is active, return to it;
- if the previous session crashed, use Neovim’s recovery option;
- compare recovered content;
- save only when you understand which version should win;
- remove stale swap state only after recovery is complete.
Do not automatically delete swap files because the warning is annoying.
8.33 — Recover From a Swap File
A standard Neovim recovery command can be:
nvim -r FILEExample:
nvim -r ~/.config/hypr/bindings.luaThe exact recovery prompt may also offer actions directly when opening the affected file.
Use the current Neovim prompt as the primary guide.
8.34 — If You Do Not Want Neovim
That is completely valid.
Current Omarchy documentation explicitly supports alternative editors.
Use:
Super + Space
→ Install
→ Editor
Then set the default under:
Super + Space
→ Setup
→ Defaults
→ Editor
The best editor is the one that lets you work effectively.
8.35 — Recommended Editor Strategy
For this course:
Learn enough Neovim to survivebecause:
- it is the Omarchy default;
- it is integrated deeply;
- it works entirely in the terminal;
- it fits Tmux perfectly;
- it is always useful for quick config editing.
But:
You do not need to become a Vim specialist to use Omarchy successfully.
If your productive editor is Cursor, Zed, VS Code, Helix, or another supported option, use it.
8.36 — Theme Integration
Current Omarchy documentation states that theme matching is offered for editors including:
- VS Code;
- Cursor;
- VSCodium;
- Helix.
Omarchy’s own theme system also generates styling for Neovim.
This allows the editor to visually match the workstation.
You will explore this properly in the themes module.
8.37 — Do Not Build a Neovim Config From Scratch Yet
Current Omarchy already ships a complete omarchy-nvim configuration built on LazyVim.
For a beginner, immediately replacing it with a custom Neovim configuration creates unnecessary complexity.
Use the provided setup first.
Only customize when you can clearly answer:
What specific problem am I solving?
8.38 — Editor Configuration vs Omarchy Configuration
Keep these concepts separate.
Neovim config
→ controls editor behavior

Omarchy config
→ controls workstation behavior
You may edit Omarchy config using Neovim, but that does not make the file part of Neovim configuration.
This distinction prevents a lot of confusion.
8.39 — Find Before Opening
In a large project, prefer:
Space Spaceover manually drilling through nested directories.
If you know text rather than filename:
Space S GThis mirrors what you learned in the terminal:
fd
→ filenames

rg
→ contents
and now gives you an editor-integrated version of the same workflow.
8.40 — Search First, Edit Second
A strong codebase-navigation pattern is:
search symbol
↓
inspect results
↓
open relevant file
↓
understand context
↓
edit
This is much safer than guessing where functionality lives.
The same principle applies to AI agents.
8.41 — Practical Exercise: Open a Project
Run:
cd ~/Projects/YOUR_PROJECT
nvim .
Then:
Space SpaceSearch for:
READMEOpen it.
8.42 — Practical Exercise: Edit and Save
Open a harmless practice file.
Press:
iAdd one line.
Press:
EscThen:
:wVerify the file from another terminal:
git diffThis connects editing to Git immediately.
8.43 — Practical Exercise: Search the Project
Inside Neovim:
Space S GSearch for:
TODOor another known project symbol.
Open one result.
Notice how much faster this is than manually searching files.
8.44 — Practical Exercise: File Sidebar
Toggle:
Space EMove between sidebar and editor:
Ctrl + W WResize:
Ctrl + Left/RightThen close/toggle the sidebar again.
8.45 — Practical Exercise: Git Controls
Make one harmless edit.
Then:
Space G GInspect the change in Lazygit.
Do not commit if this is only a test.
Return to Neovim.
8.46 — Practical Exercise: Open Omarchy Configuration Safely
Open:
nvim ~/.config/hypr/monitors.luaDo not change anything.
Identify:
- file structure;
- comments;
- existing monitor rule.
Quit:
:qThe goal is simply to become comfortable inspecting configuration.
8.47 — Practical Exercise: Default Editor Discovery
Open:
Super + Space
→ Setup
→ Defaults
→ Editor
Inspect the currently available choices.
Do not change the editor unless you want to.
The lesson is knowing where the system-wide choice lives.
8.48 — Practical Exercise: No-Mouse Editing Survival
Complete the following:
- open a project in Neovim;
- fuzzy-find a file;
- enter Insert mode;
- add a harmless line;
- return to Normal mode;
- save;
- search project contents;
- open Git controls;
- inspect the diff;
- quit Neovim.
If you can do this, you have enough Neovim knowledge for the rest of the course.
8.49 — Common Editor Mistakes
Mistake 1 — Typing and Nothing Happens as Expected
You are probably in Normal mode.
Press:
ito enter Insert mode.
Mistake 2 — Cannot Quit Neovim
Return to Normal mode:
EscThen:
:qor:
:wqMistake 3 — :q Says There Are Unsaved Changes
Either save:
:wqor intentionally discard:
:q!Do not use :q! unless you want to lose those unsaved changes.
Mistake 4 — Deleting a Swap File Immediately
The swap may contain recoverable work.
Investigate first.
Mistake 5 — Editing Omarchy’s Package-Owned Files
Normal personal configuration belongs under:
~/.confignot:
/usr/share/omarchyMistake 6 — Editing Personal Config with sudo
That can create ownership problems.
Mistake 7 — Replacing the Entire Omarchy Neovim Setup on Day One
Use the provided setup first.
Customize intentionally later.
Mistake 8 — Thinking You Must Use Neovim
Omarchy supports alternatives.
Use the editor that keeps you productive.
Mistake 9 — Navigating Huge Projects Only Through the Sidebar
Use:
Space Spaceand:
Space S Gfor fast navigation.
Mistake 10 — Editing Before Understanding the Change
Search and inspect first.
Then edit.
This is especially important for system configuration and AI-generated changes.
8.50 — Checkpoint
Before moving on, you should be able to answer yes to the following.
Editor Integration
- I know how Omarchy selects the default editor.
- I know the current Omarchy default is Neovim.
- I know how to install/select another editor.
- I can launch the editor from Omarchy.
- I can launch Neovim from the terminal.
Neovim Survival
- I understand Normal mode.
- I understand Insert mode.
- I can return to Normal mode with
Esc. - I can save.
- I can quit.
- I can save and quit.
- I can undo.
Navigation
- I know the leader key is
Spacein the current LazyVim setup. - I can fuzzy-find files with
Space Space. - I can search project contents with
Space S G. - I can toggle the sidebar with
Space E. - I can open Git controls with
Space G G.
Safety
- I know that personal Omarchy config belongs under
~/.config. - I do not edit personal config with
sudo. - I understand what a Neovim swap warning means.
- I know to recover before deleting stale swap state.
8.51 — What You Can Now Do
After completing Module 8, you can now:
- use Omarchy’s default editor productively;
- survive the important Neovim modes;
- open projects correctly;
- find files without browsing manually;
- search code across the project;
- inspect Git changes from inside the editor;
- edit Omarchy configuration safely;
- recover from common Neovim swap situations;
- choose a different editor without breaking the Omarchy workflow;
- integrate the editor into your Tmux + Git + AI environment.
Most importantly:
The editor is now a tool inside your development system, not a separate world you need to master before you can be productive.
Module 8 Summary
Default editor:
Current Omarchy default
→ Neovim

Configuration
→ omarchy-nvim
→ LazyVim-based setup
Launch:
Super + Shift + Nor:
nvim .Core modes:
Normal mode
→ commands/navigation

i
→ Insert mode

Esc
→ Normal mode
Survival commands:
:w
→ save

:q
→ quit

:wq
→ save + quit

:q!
→ quit and discard
Current Omarchy/LazyVim navigation:
Space
→ command discovery

Space Space
→ fuzzy-find file

Space E
→ file sidebar

Space S G
→ search project contents

Space G G
→ Git controls
Safe config editing:
~/.config
→ your configuration

/usr/share/omarchy
→ Omarchy-owned files
Swap recovery:
nvim -r FILEAnd the most important lesson:
Learn enough Neovim to be safe and productive. Go deeper only if the editor itself becomes something you want to master.